Mixpanel Connector Guide
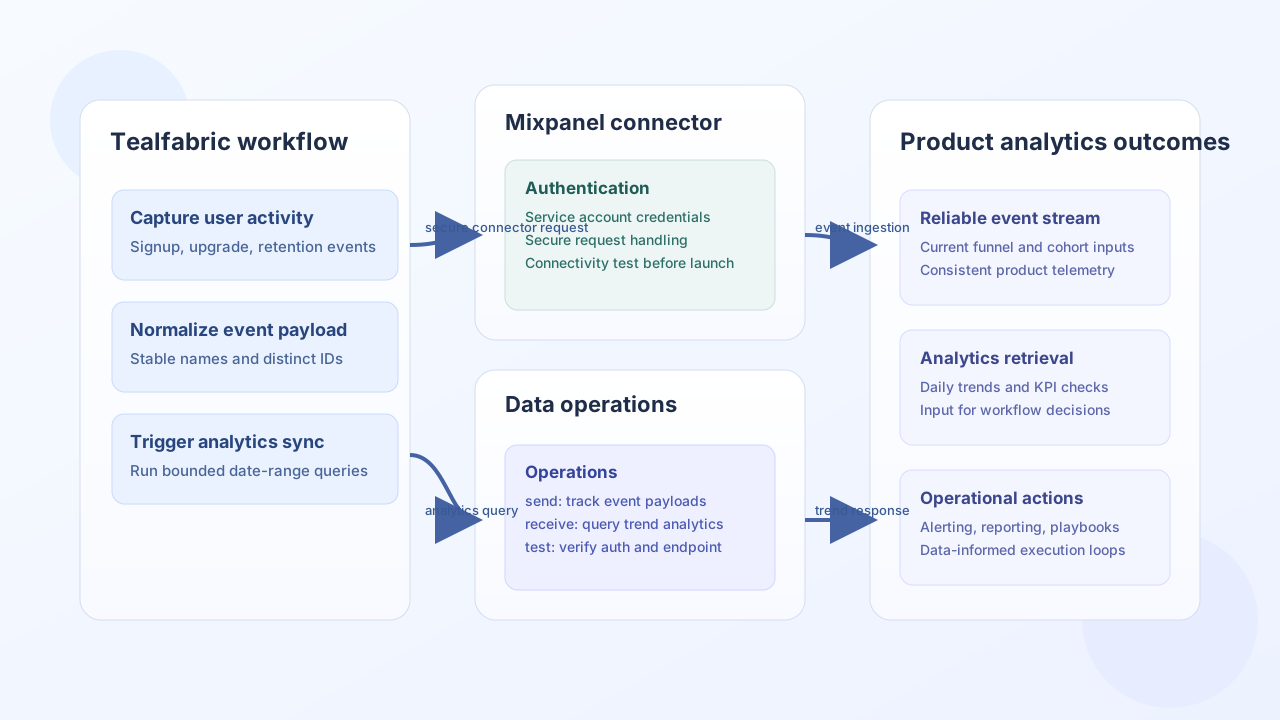
The Mixpanel connector helps Tealfabric workflows send product events and pull analytics data for reporting, lifecycle automation, and operational monitoring. It is best used when your process needs to both publish behavioral signals and read aggregated trends without manually moving data between tools.
Document information
| Field | Value |
|---|---|
| Canonical URL | /docs/04_connecting-systems/connectors/m/mixpanel |
| Version (published date) | 2026-05-08 |
| Tags | connectors, reference, mixpanel |
| Connector ID | mixpanel-1.0.0 |
Configuration and authentication
Configure the connector with a Mixpanel service account so workflow traffic is isolated from personal user accounts. In most cases, keeping the default base URL is correct, and only credentials plus timeout settings need to vary by environment. Validate access early with the test operation before production runs; only test enforces required api_key validation (matching legacy connector behavior).
api_key(required fortest): Mixpanel service account credential.receiveappendsapi_keyto the query string when missing;senddoes not inject it automatically.api_secret(optional): Secret for endpoints that require it.base_url(optional): Defaults tohttps://mixpanel.com/api/2.0.timeout_seconds(optional): Request timeout for connector calls.
Track events with send
Use send to push product or workflow events into Mixpanel so dashboards and cohorts stay current. Keep event names stable and include consistent distinct_id values to preserve clean analytics over time.
const baseUrl = "https://api.example.com/api/v1";
const tenantId = "<TENANT_ID>";
const apiKey = "<API_KEY>";

async function trackSignupEvent(integrationId: string) {
  const response = await fetch(`${baseUrl}/integrations/${encodeURIComponent(integrationId)}/execute`, {
    method: "POST",
    headers: {
      "X-API-Key": apiKey,
      "X-Tenant-ID": tenantId,
      "Content-Type": "application/json",
    },
    body: JSON.stringify({
      operation: "send",
      endpoint: "track",
      data: {
        event: "User Signup Completed",
        properties: {
          distinct_id: "<ENTITY_ID>",
          plan: "growth",
          source: "onboarding-flow",
          time: Math.floor(Date.now() / 1000),
        },
      },
    }),
  });
  if (!response.ok) throw new Error(`Request failed: ${response.status}`);
  const payload = await response.json();
  return payload.data;
}
curl -X POST "https://api.example.com/api/v1/integrations/<ENTITY_ID>/execute" \
-H "X-API-Key: <API_KEY>" \
-H "X-Tenant-ID: <TENANT_ID>" \
-H "Content-Type: application/json" \
-d '{
"operation": "send",
"endpoint": "track",
"data": {
"event": "User Signup Completed",
"properties": {
"distinct_id": "<ENTITY_ID>",
"plan": "growth",
"source": "onboarding-flow",
"time": 1735689600
}
}
}'
{
  "success": true,
  "message_count": 1,
  "data": {
    "status": 1,
    "error": null
  },
  "response": {
    "status": 1,
    "error": null
  }
}
Retrieve analytics with receive
Use receive when workflows need trend data, such as daily signups or conversion movement, before deciding what to do next. Keep time windows explicit and narrow enough for reliable recurring jobs.
const baseUrl = "https://api.example.com/api/v1";
const tenantId = "<TENANT_ID>";
const apiKey = "<API_KEY>";

async function getSignupTrend(integrationId: string) {
  const response = await fetch(`${baseUrl}/integrations/${encodeURIComponent(integrationId)}/execute`, {
    method: "POST",
    headers: {
      "X-API-Key": apiKey,
      "X-Tenant-ID": tenantId,
      "Content-Type": "application/json",
    },
    body: JSON.stringify({
      operation: "receive",
      endpoint: "events",
      query: {
        event: "[\"User Signup Completed\"]",
        from_date: "2026-05-01",
        to_date: "2026-05-07",
        unit: "day",
      },
    }),
  });
  if (!response.ok) throw new Error(`Request failed: ${response.status}`);
  const payload = await response.json();
  return payload.data;
}
curl -X POST "https://api.example.com/api/v1/integrations/<ENTITY_ID>/execute" \
-H "X-API-Key: <API_KEY>" \
-H "X-Tenant-ID: <TENANT_ID>" \
-H "Content-Type: application/json" \
-d '{
"operation": "receive",
"endpoint": "events",
"query": {
"event": "[\"User Signup Completed\"]",
"from_date": "2026-05-01",
"to_date": "2026-05-07",
"unit": "day"
}
}'
{
  "success": true,
  "message_count": 7,
  "total_size": 7,
  "data": [
    {"date": "2026-05-01", "value": 124},
    {"date": "2026-05-02", "value": 131}
  ]
}
Test connection with test
Use test to validate api_key and probe GET engage with the configured credentials. This is the only operation that rejects missing api_key up front.
{
  "operation": "test"
}
{
  "success": true,
  "message": "Mixpanel connection test successful",
  "details": {
    "api_base_url": "https://mixpanel.com/api/2.0"
  }
}
Reliability guidance
Analytics workloads fail most often from credential drift, oversized date ranges, or repeated retries during rate limiting. Keep service account credentials scoped and rotated, run bounded queries, and add retry backoff for transient failures. These controls keep your Mixpanel integrations dependable as traffic grows.