Intercom Connector Guide
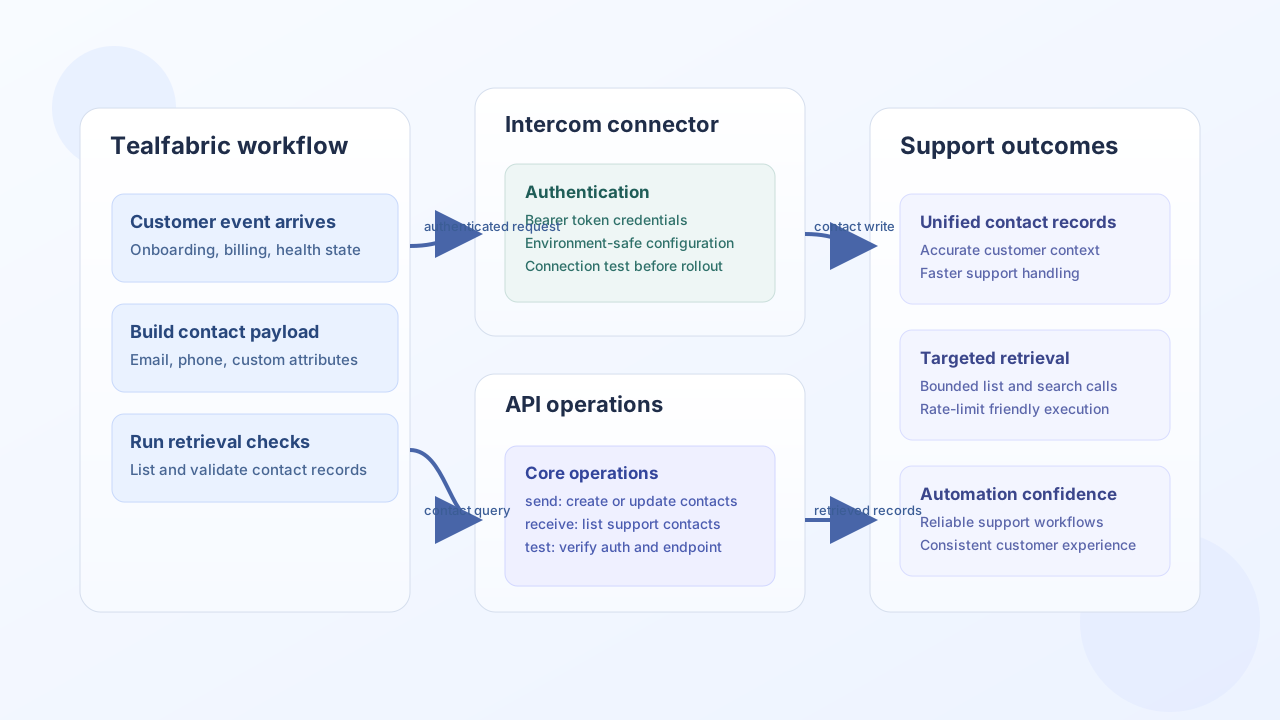
The Intercom connector lets Tealfabric workflows create, update, and retrieve customer support records in Intercom. It is especially useful when product events or back-office processes should trigger customer messaging actions without manual work.
Document information
| Field | Value |
|---|---|
| Canonical URL | /docs/04_connecting-systems/connectors/i/intercom |
| Version (published date) | 2026-05-08 |
| Tags | connectors, reference, intercom |
| Connector ID | intercom-1.0.0 |
Configuration and authentication
Configure this connector with an Intercom access token from a service-owned Intercom app so your automation remains auditable and stable. Keep the default API base URL unless Intercom instructs otherwise, and run test before enabling production workflows. A clean environment setup prevents most integration errors later.
token(required): Intercom bearer token.base_url(optional): Defaults tohttps://api.intercom.io.timeout_seconds(optional): Request timeout for API calls.
test is the only operation that validates required configuration (token). Other operations (send, receive, sync, batch) proceed with the configured token and surface Intercom API auth errors when the token is missing or invalid, matching legacy PHP behavior.
Create or update contacts with send
Use send when your workflow needs to create a new contact or update customer attributes after a business event. Keep identifiers consistent and include only relevant custom attributes so customer records remain clear and usable for agents.
const baseUrl = "https://api.example.com/api/v1";
const tenantId = "<TENANT_ID>";
const apiKey = "<API_KEY>";

async function upsertSupportContact(integrationId: string) {
  const response = await fetch(`${baseUrl}/integrations/${encodeURIComponent(integrationId)}/execute`, {
    method: "POST",
    headers: {
      "X-API-Key": apiKey,
      "X-Tenant-ID": tenantId,
      "Content-Type": "application/json",
    },
    body: JSON.stringify({
      operation: "send",
      endpoint: "contacts",
      method: "POST",
      data: {
        email: "customer@example.com",
        name: "Jordan Miles",
        phone: "+15551234567",
        custom_attributes: {
          lifecycle_stage: "onboarding",
          account_tier: "growth",
        },
      },
    }),
  });
  if (!response.ok) throw new Error(`Request failed: ${response.status}`);
  const payload = await response.json();
  return payload;
}
curl -X POST "https://api.example.com/api/v1/integrations/<ENTITY_ID>/execute" \
-H "X-API-Key: <API_KEY>" \
-H "X-Tenant-ID: <TENANT_ID>" \
-H "Content-Type: application/json" \
-d '{
"operation": "send",
"endpoint": "contacts",
"method": "POST",
"data": {
"email": "customer@example.com",
"name": "Jordan Miles",
"phone": "+15551234567",
"custom_attributes": {
"lifecycle_stage": "onboarding",
"account_tier": "growth"
}
}
}'
{
  "success": true,
  "message_count": 1,
  "data": {
    "id": "<ENTITY_ID>",
    "email": "customer@example.com",
    "name": "Jordan Miles"
  },
  "response": {
    "id": "<ENTITY_ID>",
    "email": "customer@example.com",
    "name": "Jordan Miles"
  }
}
Retrieve customer records with receive
Use receive to fetch contact lists or targeted records for routing, enrichment, or support-quality checks. Keep page size and filter conditions explicit to reduce noise and avoid unnecessary API load.
const baseUrl = "https://api.example.com/api/v1";
const tenantId = "<TENANT_ID>";
const apiKey = "<API_KEY>";

async function listOnboardingContacts(integrationId: string) {
  const response = await fetch(`${baseUrl}/integrations/${encodeURIComponent(integrationId)}/execute`, {
    method: "POST",
    headers: {
      "X-API-Key": apiKey,
      "X-Tenant-ID": tenantId,
      "Content-Type": "application/json",
    },
    body: JSON.stringify({
      operation: "receive",
      endpoint: "contacts",
      query: {
        per_page: 25,
      },
    }),
  });
  if (!response.ok) throw new Error(`Request failed: ${response.status}`);
  const payload = await response.json();
  return payload.data ?? [];
}
curl -X POST "https://api.example.com/api/v1/integrations/<ENTITY_ID>/execute" \
-H "X-API-Key: <API_KEY>" \
-H "X-Tenant-ID: <TENANT_ID>" \
-H "Content-Type: application/json" \
-d '{
"operation": "receive",
"endpoint": "contacts",
"query": {
"per_page": 25
}
}'
{
  "success": true,
  "message_count": 2,
  "data": [
    {
      "id": "<ENTITY_ID>",
      "email": "customer@example.com",
      "name": "Jordan Miles"
    },
    {
      "id": "<ENTITY_ID>",
      "email": "alex@example.com",
      "name": "Alex Rivera"
    }
  ],
  "total_size": 2
}
Reliability guidance
Most production issues come from expired tokens, unbounded list calls, or retries without backoff during rate-limit windows. Validate credentials periodically, request only the fields and pages you need, and apply retry logic for transient errors. These practices keep Intercom automation predictable for both support and operations teams.