WebApp Custom Domain Guide
Document information
- Canonical URL:
/docs/05_apps-webhooks-and-surfaces/24_webapp-custom-domain - Version:
2026-08-13 - Tags:
webapps,dns,guides
This guide explains how to publish a WebApp on your own domain instead of the default Tealfabric hostnames. It covers DNS prerequisites, platform configuration, certificate provisioning expectations, and validation steps for production rollout. Use this workflow when you need branded URLs such as apps.company.com/form.
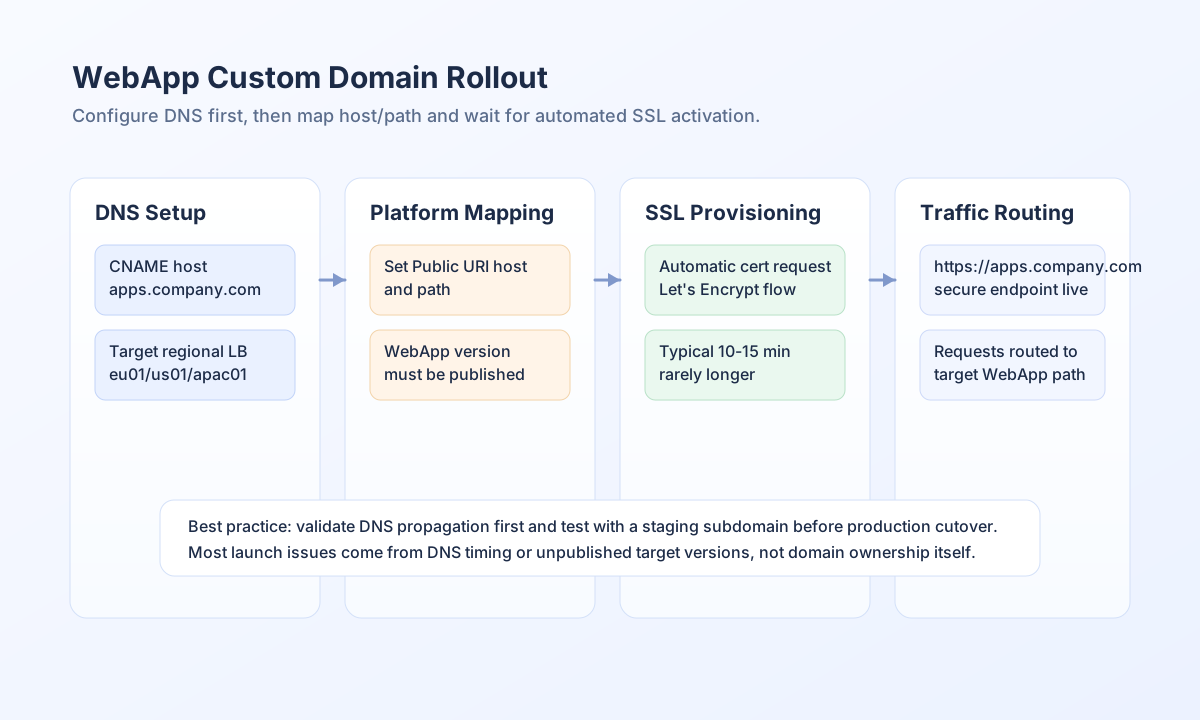
Understand the custom-domain flow
Custom domain routing depends on two systems working together: your DNS provider and Tealfabric public URI configuration. DNS points your host to the correct regional load balancer, while platform configuration maps the host/path to a published WebApp. SSL issuance is then automated, but only after DNS is reachable and valid.
Configure DNS before platform settings
Create a CNAME record for your chosen subdomain, then wait for propagation before saving the host in WebApp settings. If DNS is missing or not yet propagated, certificate provisioning usually fails or stalls.
Use the appropriate regional CNAME target:
- EU/EEA:
eu01-lb.tealfabric.io - USA/Canada:
us01-lb.tealfabric.io - Asia/Pacific:
apac01-lb.tealfabric.io - Other regions:
eu01-lb.tealfabric.io
You can verify CNAME resolution from your terminal before continuing:
dig apps.company.com CNAME
Save public URI in WebApp settings
In WebApps settings, enter the custom host without protocol, then define the path segment for the target app route. Keep paths explicit and avoid whitespace or trailing formatting artifacts.
Typical values:
- Host:
apps.company.com - Path:
/registration
Custom domains are same-origin for cookies (auth_transport=cookie). Callers from a different origin must use Bearer (Authorization: Bearer) instead. See WebApps Authentication.
After saving, the platform starts route-map regeneration and certificate requests automatically. Initial activation commonly completes in 10-15 minutes, but rare cases can take longer depending on DNS and CA response times.
Automate validation with API checks
Operational teams can validate DNS and rollout readiness using API and shell checks before announcing the new URL. Keeping this in release checklists prevents broken launch links.
const baseUrl = "https://api.example.com/api/v1/webapps";
const tenantId = "<TENANT_ID>";
const apiKey = "<API_KEY>";

async function verifyWebApp(webappId: string) {
  const response = await fetch(`${baseUrl}/${encodeURIComponent(webappId)}`, {
    method: "GET",
    headers: {
      "X-API-Key": apiKey,
      "X-Tenant-ID": tenantId,
      "Content-Type": "application/json",
    },
  });
  if (!response.ok) throw new Error(`WebApp lookup failed: ${response.status}`);
  return response.json();
}
curl -X GET "https://api.example.com/api/v1/webapps/<ENTITY_ID>" \
-H "X-API-Key: <API_KEY>" \
-H "X-Tenant-ID: <TENANT_ID>" \
-H "Content-Type: application/json"
{
  "success": true,
  "data": {
    "entity_id": "<ENTITY_ID>",
    "name": "Registration Form",
    "status": "active"
  }
}
Reduce migration risk
For existing production domains, test first with a staging subdomain such as staging-apps.company.com. Once TLS and routing are confirmed, repeat the same configuration pattern for production. Keep DNS TTL lower during migration windows to accelerate corrections if needed.
If you see TLS warnings or 404 responses after setup, verify DNS propagation, WebApp published status, and host/path formatting first. These checks resolve most custom-domain incidents without deeper infrastructure intervention.
See also
A successful custom-domain rollout depends on correct DNS sequencing, clear WebApp routing config, and realistic certificate timing expectations. With that discipline, branded URLs can be activated reliably and safely.